Monday, December 1, 2008

Chocolate Christmas Cake...

Maria and Rosie of Sweet & Simple Bakes have again come up with a beautiful recipe and have stimulated many a creative mind to put their thoughts into action and make a regular bake an extraordinary and memorable one...As part of their November Bake Off they have asked fellow bloggers to partake in baking a sumptuous Chocolate Christmas Cake...

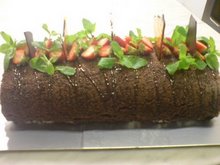
Here is my effort of this beautiful cake...A modest effort to make something wonderful to look extra special....

Here's how it started...firstly with the Fruit Mince (sometimes called as mince meat)...I adopted the recipe given by them here....I made this fruit mince 2 days in advance in order to let the fruit develop more flavour.

Then Proceeded in making the cake...The recipe for the cake is given at S&SB here...

I dont have to put up the recipe as it is very clearly explained by the girls at S&SB. All I will do is put up pictures of the step by step procedure I have followed for the cake.

1. All Ready to go into the Oven.


2. Perfectly baked and cooling down rapidly.


3. Ready to be decorated.

4. I used store bought ready to use Marzipan (I'm not a huge fondant enthusiast) to decorate the cake. I then proceeded colouring the marzipan using liquid food colours making sure I wore gloves while working in the colours to avoid staining my hands.

Make sure you keep the marzipan wrapped in order to prevent it from drying out completely.

5. Then covered the top part of the cooled cake with plain uncoloured marzipan. (Roll the marzipan on a flat surface and dust the surface with Icing Sugar if needed in order to prevent it from sticking).


6. Using mini cookie cutters,I cut out desired shapes out of the different coloured marzipan.


7. Then went on decorating the cake with the coloured marzipan bits. I also used silver coated sugar balls to essentuate the look of the different shapes.


8. A close-up of the marzipan decorations.


9. To Finish off the decoration with a bit of classy touch is a nice wide Satin Ribbon in magenta to give that extra bit of Oumph.


10. And here it is...one of my best creations to date...(thanks to the ideas given by Rosie and Maria)


It has been an exciting experience working on this bake. My husband was so impressed that he decided to take it to his staff Christmas Party and guess what it was a huge success at the party. And I am truly happy for it.


Hope this has impressed my blogger friends as much...

Thanks to Rosie and Maria for such a lovely round up of this months bake. Please check the others here...

I am definitely looking forward to participate in next months bake.
Until next time...Loads of Love...Amu :-)

Monday, November 3, 2008

A Token of Appreciation...

Praneetha of Kitchen Flavours has passed on this Butterfly Award to me. This Award is given to by Fellow Bloggers who consider other blogs/sites as some of the Coolest they have come across. Thanks Pranee(as we call her) for passing this to me and thinking that my Blog is worthy of it. This surely has boosted my spirits up.


The Rules of the award are:
1. Put the logo on your blog.
2. Add a link to the person who awarded you.
3. Nominate 10 other blogs.
4. Add links to those blogs on yours and leave a message for your nominees on their blogs.


I have been away from the blogging world for a long time now. Several reasons and I dont want to get into depth as to why and this award has surely come my way to cheer me up. Thank You Pranee once again.
See you Soon...Amu :-)

Monday, September 1, 2008

Victoria Sandwich Cake...

I recently accidently stumbled upon a Brilliant Blog that belongs to Rosie and Maria...They call it Sweet & Simple Bakes...and true to the name...they do have a sweet and simple blog that encourages people new to baking by giving loads of useful tips and resources to help them learn a new skill...which I personally think is very noble of them..

Not only that they also have a Monthly Bake Concept where they come up with a different but still an easy recipe that they have tried and tested and encourage co-bloggers and others who follow their blog to participate by baking it and to share their experiences while doing it...This is such a great effort on their part and I truly appreciate them for the encouragement they are giving to many people like me because of this...Thanks Rosie and Maria....

So I decided that if time permits I will participate in their monthly bake off for the month of August which is Victoria Sandwich Cake...But since then I have been really busy at work and also because of the festive season could not get to cook it up until this weekend...I rushed off shopping and bought stuff that I needed...and started off...

The recipe and method of preparation for the Victoria Sandwich Cake can be found here...

I have used the same same recipe for the cake base...only changed the filling as per our liking as buttercream is not one of my favourite for a cake baked at home. Also since I didnot have two cake tins...I baked them in a single ring mould I use to bake my regular sponges...and then after cooling them cut them into two halves...and proceeded using them as given in the recipe by its inceptors Rosie and Maria...

Since I dont have to give step by step instructions to the recipe as it is very clear in the recipe given in Sweet and Simple Bakes....I will put up pictures instead..:-)

1.Getting Cake Mould Ready...

2. Creaming Butter and Sugar...

3. Cake mixture in the mould ready to go into the Preheated Oven...

4. Cake baked and cooling on a Cake Rack...

5. One half of the cake topped with Homemade Strawberry Preserve...

6. Topped with Whipped Cream...

7. And Strawberries...

8. And finally other half on top...and dusted with pure Icing Sugar...

And the Final Result...I am pretty Happy with the result and so are the people who finished it off...but I guess the pictures are not as clear...but cant undo it...because already the cake is long gone as they say it was simple irresistable...WOW !!! All thanks to Rosie and Maria of Sweet and Simple Bakes...

I was not able to click a snap of a single slice....because it was over before I got to do it..which is quite sad..but when I make it another time...I will update this post with it...

It has been a great experience working on this month's Bake... Hope Rosie and Maria approve this...and my bake is upto their standards and expectations...and you all enjoyed reading this post....

Please do drop by Sweet and Simple Bakes and check out the monthly round-up for this Bake...

So until next time...Take Care..:-)

Wednesday, August 27, 2008

Remember Britannia Little Hearts....


Love is in the Air...and what best way to express it than with a treat that always wins hearts....

They are coming your Way....:-)
Check out this page soon....

Saturday, August 23, 2008

Award Time Again...:-)

Praneetha Raghava of Kitchen Flavors and EC of Simple Indian Food have passed on this 'Wylde Woman Award' to me.

Thank you so much Pranee and EC for considering me worthy of this Award. I really dont know if I deserve it. This gesture is very much appreciated. It gives me a lot of motivation to keep this Blog going on with more and more innovative posts. Thank You So Much ..:-)

The rules of this award are:
1.You can give it to one or one hundred or any number in between - it's up to you. Make sure you link to their site in your post

2. Link back to this blog site http://tammyvitale.typepad.com/ Tammy can go visit all these wonderful men and women and remember the Purpose of the Award: To send love and acknowledgment to men and women, who brighten your day, teach you new things and live their lives fully with generosity and joy. It's been a blessing and an inspiration to meet all of you through your wonderful blogs.

To keep up the Tradition I would like to pass on the award to my blogger friends/ real time friends who have encouraged me from time to time not just by their comments but also through their silent acknowledgement for each and every single post. Thank You All for the tremendous support for a Blogging Novice like me. It is very very encouraging.

I would love to pass on this award to :
I would love to include Deepthi and Swathi here...but have seen that they have already received theirs from Praneetha.

Thank so much once again...
Loads of Love....Amu :-)

Friday, August 15, 2008

Tiranga Halwa...

Happy Independence Day to all Readers of this Blog....:-)

India this year has celebrated its 61st Independence Day...I feel very honoured and proud to be born as an Indian and come what may I will never give up on this Cultural Identity of mine...I strongly respect my Roots and where I come from...Though I live in a Foreign Land...there is not a day I don't think of My HomeLand. I truly cherish all the Memories of me growing up and developing all the characteristics of being a True Indian...i.e. Respect for Our Motherland India and deep-rooted trust and belief for all our Values and Traditions...which every Indian associates themselves with.

This Year August 15 falls on a very Auspicious Day of Varalakshmi Vratam (Sravana Sukravaram)...and it happens to be My Best Friends Birthday...So it was an apt day for a Triple Celebration...I was busy all day making different food items to offer as Naivedyam (Prasadam) to the Goddess Varalakshmi and then spent another couple of hours reverently praying for the Health and Good Life of My Husband...

But how can I forget My Motherland and the importance of August 15th and how well we used to celebrate this day back home...and all the sweet Goodies we used to get at school and college on this day...So I decided to make something to mark the occasion of Indian Independence Day...I remembered that my friends Spandy and Siri both came up with this wonderful treat for last years Independence Day...While theirs is a traditional recipe...I worked on producing one a little different...and with a few modifications/additions to their recipe, I made my Own Trianga Halwa...representing the colours of our Indian National Flag....SAFFORN, WHITE and GREEN....

Here goes the Recipe:
Ingredients:
1.5Cups Fine Semolina (Bombay Rava,Sooji)
1.5Cups Fine Dessicated Coconut( can use finelt grated fresh coconut)
2Cups Sugar
1Cup Ghee (Clarified Butter)
4Cups of Water
1tsp Cardamom powder
1/2Cup Roasted Cashews (powdered to a fine powder)

To Finish:
Orange Colour
Green Colour
Roasted Cashews
Sultanas

Process:
1) In a Large Pan, melt the Ghee and add the Rava and Dessicated Coconut to it and roast it on a slow flame till the ghee is well coated over them and a nice aroma wafts the air. Care must be be taken for them to not get any brown colour. So continously stir when they are getting roasted.
2) Then add the Sugar, Cardamom Powder and Powdered Cashew Powder to the the above mixture and stir it till all the ingredients are well mixed.
3) In another pot, bring 4 cups of water to a boil.
4) Slowly add the water to the rava mixture while continously stirring to avoid any lumps from forming.
5) You will know that it is cooked when the mixture starts to leave the sides of the pan.
6) Once cooked, divide the Mixture into 3 equal parts.
7) Mix both colours separately with a little water and then add Orange to one part of Halwa and Green to other part of Halwa. Mix well to ensure even distribution of colour.
8) On a warm greased plate firstly place the Green Part of Halwa and spread it to form an even layer.
9) Then place the uncoloured Halwa on top of the Green and spread it evenly again.
10) Lastly top with Orange part of Halwa and spread it to form an even layer.
11) Smooth the Sides and leave it aside to cool.
12) Using a Warm Knife, cut the halwa into desired shape and garnish it with roasted nuts and sultana. Serve them Warm or at Room Temperature.

This is how it looked...

The Orange colour might not be exact because I actually didnot have Orange...I used Yellow and added a little Pink to it to achieve this colour. My Husband and our friends who visited us for dinner that night were very impressed and enjoyed the sweet immensely...and I am very Happy that they liked it. So heres another food item I tried to be innovative with by adding Powdered Cashew and Dessicated Coconut. But if you prefer the regular Sooji Halwa...check out Spanz and Siri's Recipes which are equally Awesome...!!!

I wanted to send this entry to Pooja's Theme of the Week:Safforn,White and Green (Independence Day Special) but missed on posting the recipe by the due date...


So I am sending this across to EC's What's Your Favourite (WYF): Colour in Food Event

Recipe Source: Spandana of Cinnamom Trail and Sirisha of Ambrosia Flavours....and My Modifications...
Image Source: My Phone Camera...

Hope You All liked this Post...Please do try this version and let me know how it turns out...
So Until Next Time...Happy Cooking...:-)

Thursday, August 14, 2008

Blogging Friends Card...

Padma of Padma's Kitchen and Usha of My Spicy Kitchen has passed on this Blogging Friends Forever Card...

She is a Friend and I truly cherish this Friendship Gesture from her...Thank You so Much Padma...Much Appreciated..:-)

I would love to pass on to pass on this Friendship Card to my Good Friends...who are also my Blogging Friends...

* Keerthi of CuminHut and Microcosm...

* Swetha of Swethsy...

* Sirisha of Ambrosia Flavours...

* Deepthi of Deepthi's Cosmos...

* Poornima's Maya...

Thank You...and until next time...Take Care..:-)

Friday, August 1, 2008

Homemade Dinner Rolls...

Back again with my Bread Baking Mania...I am truly addicted to the aroma of freshly baked bread at home. These days, I have reduced the number of hours I am working because my Health is not permitting me too those long hours continuously on my feet...So I decide to cut back on my working hours and what better to do with the free hours at home than make some yummy goodies that we both eat. (Read it as My Husband does not Fuss about...:-D)

I took out the recipe I had for baking Dinner Rolls which we got in our Yeast Goods class which I used on regular basis when at School in other Kitchen classes...I used to bake these rolls to serve as accompaniment to Soups, Stews to get extra points when the final dish was served for our chef to taste and evaluate. Some Chefs were impressed as to how I found time in between cooking 4 items in a 4hour kitchen class...I always ended up getting extra points for making that extra bit of effort...and this practice helped me in my Advanced Yeast Goods Class..(I scored 98/100...highest in the school...)

The above picture is My First Dinner Roll....(It felt Great holding it)...Now the secret is that the recipe is very easy to follow and make...and they have always worked whatever be the situation...So here goes the Recipe...

Ingredients:
200gms Plain Flour/Wholemeal Flour (If you can get - Bakers or Bread Flour)
10gms Active Dry Yeast (or 5 gms Fresh Yeast)
120ml Milk
1tsp Sugar
1/2 tsp Salt
2 tbsps Butter (melted and cooled)
To Finish:
Caraway(Ajwain) Seeds/Sesame seeds
Milk to brush on top

Process:
1) Firstly heat the milk to lukewarm stage or 37*C. Be careful the milk should not be Hot if not the yeast will not be activated.

2) Add the Yeast and Sugar in a bowl and add the warm milk to it. Mix to dissolve and add the warm milk. Leave it aside till a froth develops and increases in volume. This means that the Yeast has been activated.(This Process is called Basic Proove)

3) Meanwhile Sift the flour 2 to 3 times to aerate it and add the Salt to it and keep aside.

4) Once the Yeast is ready, form a bay in the flour and slowly mix the flour to form a dough by adding the yeast mixture little by little. While mixing the flour move your hands in a circular motion collecting dough to the liquid as the hand is moving.

5) Once the dough is formed. Cover and keep aside to Proove(rise) again for about an hour or till the dough doubles in its volume.

6) Once the dough has doubled in volume, remove it onto a lightly floured surface. Then knock back the dough to its original size by kneading it in slow motion using the palm of your hand. Continue kneading for another 10 minutes till the dough is smooth and elastic.

7) Then add the melted butter and knead again till butter is well incorporated into the dough.

8) Divide into 6 equal portions (above recipe makes 6 rolls) and shape them into rolls by rolling them in a circular motion using the palms of your hands and place them on a lightly oiled baking tray. (refer picture below)


9) Leave them in a warm spot for another 20/30 minutes to rise again. (picture below)


10) Once they have risen to double their size, brush them with milk on top and sprinkle few Caraway or sesame seeds.

11)Bake them in a Preheated 200*C oven for 10 to 15 minutes or till they get a nice golden colour on top.
Disclaimer: Oven Temperatures Vary...so adjust accordingly...

12) Serve them warm from the Oven as fresh bread is at its best of taste when warm. They can be served along side soups or any dish as an accompaniment.

I eat them as it is...:-D because I bake mine using Wholemeal Flour as a healthier option....

I had these pictures that I shot long ago for the purpose of blogging...but back then never had the time to blog as regularly... as i do now...So I am using the same snaps I shot back then for this post... But I recently baked them as an accompaniment to Spicy Pav Bhaji...

Image Source: My Trusty Phone Camera
Recipe Source: Yeast Goods Class (with my own additions and deletions ofcourse..he he...:-D)

Try this recipe out and do let me know how it comes out...Until then Happy Cooking....:-)

Thursday, July 31, 2008

Another Award....Yipeee...:-)

Spandana of Cinnamon Trail forwarded me this "Brilliant WebBlog Prize".

Thank you Spandana so much for this....I feel really honoured....this was really sweet of you...:-)

Brilliant Weblog is a prize given to sites and blogs that are smart and brilliant both in their content and their design. The purpose of the prize is to promote as many blogs as possible in the blogsphere. Here are the rules to follow:

  • When you recieve the prize you must write a post showing it, together with the name of who has given it to you, and link them back.
  • Choose a minimum of 7 blogs (or even more) that you find brilliant in their content or design. Show their names and links and leave them a comment informing they were prized with ‘Brilliant Weblog’.
  • Show a picture of those who awarded you and those you give the prize (optional).

To not break the custom, I now pass on this Award to Sirisha's Ambrosia Flavours, Usha's Spicy Kitchen, Chaitali's Blog, Sia's Monsoon Spice, Deeba's Passionate about Baking Blog, Nandita's Saffron Trail, Swati Jain's SugarCraft India

I Would love to pass on this Award to each and everyone who visit my Blog....But mere laziness does not permit me too...

Thank You once again...Amu :-)

Friday, July 25, 2008

Whole Mung Bean and Mushroom Soup...

These days my Hubby is working evening shifts and comes home pretty late in the night sometimes as late as midnight. Because he works at a place where they provide meals, (yummy and varied varieties he says) he calls up and tell me that that he wont be coming home for dinner. And when he does not eat dinner at home, I loose interest in eating anything at all. So I just drink up a juice or something like that and just sleep off. Now this has had an effect on my health.

So these days I cook up a One-Pot dish which is not only easy to make but also delicious and most importantly LOW-CALORIE...I personally love consuming Soups on a day to day basis unlike my Hubby who can have it only once a while. Winter this year in Melbourne is very very chilly and what better to have for dinner than a Steamy Hot Bowl of Soup...which is also healthy...What a Bonus...:-)

So here goes the Recipe...

Ingredients:
1 Cup Whole Mung Beans (Moong Dal or Pesaralu)
1 Medium Onion (chopped finely)
5 pods Garlic(chopped finely as well) (I love garlic so...but you can reduce the amount)
5-10 Button Mushrooms (depending on the size....sliced up...)
2 teaspoons Olive Oil
Salt and freshly crushed pepper to taste

To Garnish:
Chopped Coriander
Slithers of Spring Onion
Yogurt

Process:
1) Wash and Soak Moong Dal in Hot Water for 10 minutes.

2) Put them in a Pressure Cooker and add 2 cups of water and some salt and pressure cook them on medium flame till you you get 2 or 3 whistles. When cooled just mash it but not to a complete paste. Keep aside.

3) Then heat the oil in non-stick pan and saute the onions till translucent. Then add garlic and sliced mushrooms and saute for further 1 minute.

4) Then add the slightly mashed moong dal and if need be more water or vegetable stock bring to boil. Simmer on low flame for 10 minutes.

5) To finish, add salt and pepper as per your liking. Garnish with chopped coriander and spring onions and a light drizzle of yogurt.

Variation:
If the above recipe is too bland for your palette, then you can add a teasppon each of Cumin and Corainder Powder. If you want it to be spicy then you can add Chilli Powder accordingly.

To make the soup more enriching you can add some cooked Barley(available in all health stores) or even Broken Burghul Wheat.

I Just like mine plain and simple and served with a Crusty Piece of Bread preferably Wholemeal or Wholegrain...

So enjoy the Soup...and until next time...
Happy Cooking :-)

Thursday, July 24, 2008

White Chocolate, Almond and Vanilla Cookies...

Last year I received a gift from my very close friend seeing how passionately involved I was getting into my Job...as a Pastry Chef... It is a 3 Book Series...Cakes, Cookies and Cupcakes and each book has 500 Recipes..:-)...Love ya Wendy for the lovely gift...

I was initially excited to get the books because that means I had means to upteem number of recipes and I could try one each day..[or I planned too...what a Joke..:-D]...First few weeks every weekend I gave a try to one or two recipes at work...(I work on weekends :-( )...but as time passed...I just left the books aside in my Book Shelf because I got more busy at work for the regular stuff and had no time to work on new recipes...let alone my experiments...:-D

But this year I was asked by my Boss to work on some new Cookie or Biscuit recipes to update our Menu...I immediately opened up the Book of 500 Cookie recipes and browsed until I ended up with this recipe...When I tried them in a small batch at home...they worked very well and i took a Taste Sample to my Boss and she was equally happy and immediately included this on our menu....Believe me it is one of the easiest recipes I have ever worked on and we produce about 250 at a time at work...and the whole making the dough and weighing and baking takes a total of just 1 hr....for 250 biscuits thats a lot less time....when comapred to the 4 hours i spend on some other Biscuit varieties.

So now lets get into some serious Biscuit Baking Business...and I will leak this guarded recipe for all of you to enjoy...

Here Goes...
Ingredients:
  • 125gms Unsalted Butter (softened to room temperature)
  • 1 Cup Caster Sugar (Fine Grain White Sugar)
  • 1 Egg (55-60 gms)
  • 1tsp Vanilla Extract (or use Vanilla bean from the Vanilla Pods)
  • 1/2 tsp Salt
  • 125gms White Chocolate Buttons
  • 60gms Slivered Almonds(or Whole Almonds sliced up into thin slithers)
  • 1+ 3/4 Cups of Self Raising Flour

Process:
1) Firstly Preheat oven to 180*C. Line a Baking tray with Baking Paper.
2) Then take the softened Butter and Sugar in a bowl and using a electric beater, beat(cream in professional terms) the mixture on a medium speed till pale and fluffy.
3) Then add the egg and vanilla and beat again till well mixed through. Donot over beat at this stage.
4) Sieve the SR Flour and Salt together into the above mixture and fold through using a spatula or spoon.
5) Then finally add the White Chocolate and Almonds and mix thru till well incorporated.
6) Make equal sized balls ( makes 20 to 25 depending on size) and place on the lined Baking Sheet atleast 5 cms Apart from each other because these spread a lot.
7) Bake initially for 10 minutes and then using the tip of your fingers flatten them slightly( very less pressure)
8) Continue baking for another 10 minutes till they get a light golden colour (to check if they are done the simple tip is you should be able to lift them easily without breaking them.)

9) Cool them and Serve.
10) When completely cold, these can be stored in an airtight container for atleast a week.

A simple but delicious Cookie recipe...and these can be made in advance for parties and can be taken as small token gifts to families you are visiting especially if they kids...and I promise they will love them...

Please Note: The Oven Types and Temperatures vary for each and everyone of us... So please bake them accordingly... If using a Fan-forced oven the temperature should reduced by 20*C (i.e 160*C). But the tip to check if your biscuits or cookies are done is given above so varying oven temperatures should not be a Problem...:-)

Image Source: My Phone Camera.

Recipe Source: 500 Cookies by Phillippa Vanstone

Hope you like this Recipe....Give it a Try and do let me Know..

Until Then...Happy Cooking :-)

Tuesday, July 22, 2008

My First Award....:-)

Dear Friends...
I am very pleased to let you all know that I have received "My Very First Blog Award"...

Keerthi of Cuminhut has passed on this award "Yummy Blog Award" to me...Thank You so much Keerthulu...Donot know if I deserve this Honour...But Thank You so Much...:-)

I dont know whether I deserve the award at all because I am not a regular blogger as would like to be because of several factors...But this Award has inspired me to push myself to do better than one post a month...So I promise from now on I would be more regular at posting most Yummy and Delicious Recipes... esp Desserts...

I am so happy and thanks to each and every visitor of this Blog. The ones I need to specially thank are the ones who leave thier valuable comments and encourage me to participate actively here...

I Therefore pass on this Award to Sirisha of Ambrosia Flavours, Spandana's Cinnamom Trial and Chaitali's Blog...

Thanks Again One(Keerthi) and All...

Loads of Love..Amu

Saturday, July 19, 2008

Pineapple Gateaux...aka Pineapple Pastry...

Finally I am blogging after a Long Gap...I have been pretty busy and then my health took a down turn...So I have reduced my work hours which has given me more time to do things I like most...like for example Cooking..:-)

Last Week I Graduated as a "Hospitality Graduate".. These two years of Study has taught me so much and it just not a New skill but Real Life Leasons especially to believe in myself and for that I am Thankful to some very good teachers at Meridian...When we came back home after the Ceremony I was reviving my memories by browing some photos of my Cake Creations made at School...My Husband was watching them with me and when the photo of the Pineapple Gateaux came up...he smiled and said I would love to eat another one of those...(Basically both of us are not very keen on eating sweet things...esp Cakes and Stuff...yeah yeah i know...Contrary to what I do...but thats how it is...)

His wish is my Command....so decided to suprise him the next day by making the cake...so the next day...I had some work in the city and after that i went shopping to buy stuff needed for the Gateaux...I hurrily shopped and rushed back home...(though it is a routine for us when I go to city to wait up for him till he finishes work and we come home together..)...but my Plans for the suprise made me hurry back...and I completed the cake in record time....

Now Coming to the Recipe....
Ingredients:
1 Sponge Cake (8" Diameter)
1 Tin Pineapple Slices (250gms to 300 gms)
500gms Whipping Cream
1tsp Pineapple Essence
2 tbsps Powdered Sugar (pure icing sugar)
150ml Syrup (make it by adding pure pineapple juice and powered sugar)
To Garnish:
Whipped Cream
Slices of Pineapple
Glace Cherries

Process:
1) Cut the sponge base in half using a serrated knife.

2) Face the soft side up of the cut sponge and then sprinkle heavily with the syrup on both cut pieces (the sponge must become really wet and soaking). Keep aside to soak the syrup well.

3) Meanwhile whip the Cream using an electric beater with whisk attachment till it forms soft peaks(when lifted with spoon, the cream should hold its shape). Halfway through the process of whipping cream add the powdered sugar and pineapple essence.

4) Keep the whipped cream chilled in a refrigerator till you use it.

5) Cut up the pineapple slices into small pieces and keep aside.

To Assemble:
1) Take one sponge base and place it facing the soft side up, then dollop 1/3rd the amount of whipped cream on top of it and spread it evenly.

2) Then spread the pineapple pieces evenly on top of the covering taking cake that there no empty spaces.

3) Carefully place the second half of the sponge on top the cream layer in such a way that the soft side goes on top of cream and hard side faces up.

4) Now spread another 1/3rd of the cream of the top layer and spread evenly on top. Use the same to mask the sides to cover up the sponge on the sides neatly.

5) Now Scoop up the remaining mixture into a piping bag with a medium star nozzle and keep aside.

6) Mark your cake into number of slices. This recipe makes 8 slices and pipe cream at the corners and centre as shown in the picture below.

7) Top up with Glace Cherries and Pineapple.

8)Decorating the Final Part is left to your imagination. If you are short for ideas then you can use the picture below to get some ideas.


I made the Sponge from scratch but you can also do them with store bought sponges and it makes the process more simpler.

Hope you like this Recipe as much as my Husband enjoyed it....and here's a slice for the ones I would love to personally serve up.


Image Source : My Phone Camera.
Recipe Source : My Cakes Class and my Ideas.

In my next post I will put up an easy to make but foolproof sponge which help in making any cakes an easy job.

So until then...Happy Cooking..:-)

Monday, May 19, 2008

Paneer Tamatari...

I am an occasional participant in a community in Orkut...known as "Mrs.Telugu Inti Adapaduchulu.."...It is a community for Telugu-Speaking married women all around the world...created and maintained very well by some very close friends...(K & S...Thanks Gals)...

Anyways a few days back, there was a recipe contesteld for the members of the community and I happened to be one of the participants...The Theme was using just one ingredient in this case a vegetable, namely "TOMATO" and this was to be used in the form of a Curry (cuisine can be anything...)...

So I used very simple recipe but to make it special, I have changed the way it is prepared. The Recipe is a fusion of traditional Mughalai Cuisine and the ever popular Italian Cuisine…When I say that many will probably not understand why but the following recipe will tell you why…This Curry has a perfect Tomato Gravy that captures all the tanginess of this lovely vegetable/fruit, but the added feature is oven roasted bits of Tomato that enhance the flavour even more…The other spices and a little cream are added to add volume to the gravy and mellow the flavour Paneer and Green Capsicum are added to go with the gravy but any vegetable can be added as per liking….

So here's my Recipe for that Contest...
Ingredients:
1 Medium Sized Tomato (diced to 1cm pieces) & 2 Medium Sized Tomatoes (cut into quarters)
1” (inch) Cinnamon Stick or Curl
2 Whole Black Peppercorns 2 Cardamoms (Elaichi)
1 Tablespoon Oil (use Olive Oil for a healthier version)
½ Green Capsicum (diced into 1cm pieces)
1 Teaspoon Ginger-Garlic Paste
1 Green Chilli (finely chopped)
1 Tablespoon Fresh Cream (fat free cooking cream)
150gms Paneer (diced into 1cm cubes)
Salt and Chilli Powder (as desired – I put ½ tsp of each in the gravy)

For Garnish:
1 Teaspoon of Fresh Cream (cooking cream)
Coriander Leaves (finely chopped)
Slithers of Capsicum
2 Paneer Cubes

Preparation Method:
1)Firstly Preheat oven to 180*C. Then on a flat baking tray place the diced tomato pieces of 1st tomato. Sprinkle a little Olive Oil over them. Cook them for 10 minutes in the oven till they shrink a little bit (a little like a semidried tomato but not as much as it).

2)Meanwhile also place the Paneer cubes onto another tray lined with foil (to prevent paneer sticking) and cook them along with the tomatoes to lightly toast them.

3)When the above two things are in the oven, cook the quartered tomatoes in a pot filled with just ¼ cup water. To this add the cinnamon stick, cardamom and peppercorn. Let it simmer on a medium flame for 10 minutes. Then blend these cooked tomatoes into a smooth puree along with the spices and ¼ teaspoon salt.

4)In a saucepan, heat the 1 Tablespoon of Oil and sauté the capsicum till translucent. Then add the Ginger-Garlic paste and chopped green chilli. Sauté them for about a minute.

5)Then add the blended Tomato puree and salt and chilli powder and cook for another 5 minutes, stirring occasionally.

6)Finally add the toasted paneer, cream and oven-roasted tomatoes. Mix well and cook for 1 more minute and then take away from heat.

7)Serve hot garnished with a little chopped coriander and fresh cream drizzled over. (For presentation sake I used Paneer cubes and Slithers of Capsicum)

8)This curry goes well with Parathas or with Jeera Rice.


As the recipe using baking/ roasting when compared to frying/deep frying, it is naturally a healthier option. On top of it not much of fatty products like butter or ghee are used. Only a tablespoon of fat free fresh cooking cream is used so it is also not high in calories. The only other fat used is Olive Oil and it is less in cholesterol and in calorie content therefore making it a healthy option as well.


I won a Consolation Prize for the Contest...here is my Certificate of Appreciation from the Contest Organisers and Judges...Thank you once again TIA...:-)

I am Very Happy...that my effort was appreciated....

Hope this is another Recipe that sparks your Interest...Happy Cooking...:-)

Mixed Veggie and Cous-Cous Shorba...

I Am Sorry...I know I promised to follow up with this Soup Recipe for the bread I posted below...But I just got caught up in doing stuff and been busy at work...so could not find much time to update the blog as I would have wanted too...Anyways...I very much believe in the saying - "Better Late than Never.." So here goes...

Recipe Origin and Background

As I have already told you in earlier posts, nothing can ever beat the taste of our Mom's Cooking...and for me My Mom is the best known cook ever...So this recipe is hers...and is definitely one of my favourites and I will explain why?...

We always had these Multi-Cuisine Dinners on saturday....our mom used to cook different dishes she learnt from travelling abroad...basically to spark an interest in us towards cooking...as part of training or preping us to be atleast passable cooks when the right time cooks...(Can't Thank her enough for that training...helped me in more ways than one...and obviously making a total fool of myself...)

Mom and Dad used to work in Algeria(North Africa) and the cuisine their had a lot of French Influence (being a french colony...) and also neighbouring Islamic Cuisine influences esp that of Moroccan...I heard from mom that this soup was like a speciality dish for large family gatherings because it was not only easy but also wholesome, filling and also nutritious...and dont get me started the importance of a balanced nutritious diet in the eyes of my mom...(she being a Doc...)...I can end up writing pages...on how she inculcated from early on the importance of a balanced diet...

Anyways...Cous-Cous is the Staple Food Crop of the North African Countries...(Just like how rice and wheat are to us Indians...) ...It is made from Corn...basically it is coarsely ground Corn or Maize...used as an accompaniment to soups, mains mainly made of meat or consumed as it is with a flavourings...

In this recipe I have added Cous-Cous into the soup to give it that extra bit of Oumph and also to make it more like a main dish rather than a starter...Now comes the recipe...


Ingredients:

  • 2 Large Potatoes (cut into Big chunks)
  • 2 Carrots (cut into Big chunks)
  • 2 Tomatoes (Roughly Diced)
  • 1 Medium Onion (Roughly Diced)
  • 4 Green Chillies (Slit Length-wise)
  • 1 teaspoon of Ginger-Garlic paste
  • 1 Cup Boiled Chickpeas(Chole - Soaked overnight)
  • 1/2 Cup Cous-Cous(Medium Grain)
  • 1 Vegetable Stock cube
  • Spices - 1 teaspoon each of ground Cumin and Coriander
  • Seasoning - Salt, Pepper and a little Chilli Powder
  • To Garnish - Roughly chopped Corainder Leaves.

Process:

1) Firstly heat about a tablespoon of olive oil in a pressure cooker...then add in the onion and green chillies and saute for a little while.

2) Then add in the ginger-garlic paste and the spices and saute it on a medium heat for one more minute till the raw flavour from the spices is gone.

3) Then add the veggies and saute them till the spices are well coated over them... add the Chickpeas and the Cous-Cous and mix then well..

4) Add the seasoning as required and suitable to your palate..

5) Finally add the dissolved vegetable stock cube and about 1 litre of water to the veggie mix.

6) Cover and pressure cook it on a low flame till you get 3 whistles.... and increase to high and let another 2 whistles come...

7) Cool and when the pressure is completely out... open the lid and check if there is enough liquid (cous-cous makes the soup thick)...if the soup is watery ...just let it simmer on a low flame for a little while...or else if the soup is too thick then add in a little more liquid and simmer it for a little while...

8) Add in a little chopped coriander to the soup as garnish..This soup is a main dish in itself...you donot need anything else...but I serve it with a little crusty bread on the side...to slurp up all the yumminess...

If unable to get Cous-Cous, Broken Burghul wheat or Durham wheat (Goduma Rava) as a subsitute...Any vegetables can be used like Beetroot, Peas, Corn, Radish, Broccoli, Cauliflower etc..

So as promised - A Tasty, Wholesome Soup which is not only nutritious but also Very Very easy to make...

Image Source: My Trusty Phone Camera
Recipe Source: My Mom

Hope you enjoy this recipe of mine...Happy Cooking...:-)

Sunday, March 9, 2008

Foccacia (Italian Herb Bread)...

Winter is one time of the year I actually donot mind spending hours in front of a Hot Oven be it in the comfort of our Home or at Work...It is just not the heat but the delicious aromas that waft around the apartment when baking anything that actually inspires me to bake more and more...especially on a cold evening and guess what it tickles B's hunger pangs even more and he actually eats more than he usually does (which I am very happy about...because he is thin as a stick)...and enjoys the meal...and usually does not complain like he always does...

I was on a Bread Baking Mania sometime back...one item that I made sure that I baked on a regular basis was an Italian Herb Bread variety known as "Foccacia"... There is always a great debate on how the word 'Foccacia' is spelt and pronounced. Anyways I got this spelling from one of my teachers at school and he seems to be quite sure that this is the spelling...

We personally prefer this to the regular bread because it has olive oil and oregano, two of my favourite ingredients...and you can pile on any top garnish as you wish...I personally grate some cheddar cheese, chop up some olives and sun-dried tomatoes and spread that on top...to give that extra boost of taste....

You can eat this bread as it is or slice up and use as regular bread with whatever fillings you prefer...I eat it slices as it warm from the oven....or sometimes use it as an accompaniment to the soups and pasta dishes I make...

So here goes the recipe...to make one Loaf...
Ingredients:
250ml Water(lukewarm)
8gms Dry Yeast(1 Sachet) or 5gms if using Fresh Yeast
350gms Plain Flour
1teaspoon Salt
1teaspoon Dry Oregano
20ml Extra Virgin Olive Oil

Other Ingredients: (Optional)
A few Sun-Dried tomatoes( roughly diced)
A few Spanish Black Olives(sliced)
A Tablespoon of grated Cheddar Cheese
Some Dried Oregano to sprinkle on top
Olive Oil

Process:
1. Firstly Warm water until is body temperature or lukewarm...add the yeast to it and a teaspoon of SUGAR...then cover it and leave it aside for about 10 minutes...

2. Meanwhile sieve the flour... and add the salt, olive oil and dried oregano to the flour and mix in the ingredients well..

3. The yeast water after 10 minutes should appear frothy proving that the yeast has started growing...add this water to the flour mix and mix it till it becomes a smooth dough...if the dough appears sticky then add a little more flour to make the dough smooth...but a little moisture will actually help the dough to proove(yeast growing) well...knead well using your palms for about 10 minutes

4. Then place the dough in an oiled bowl...cover it and keep in it in a warm spot...and leave it till the dough doubles in size...

5. Then roll out the dough onto a floured surface and knock out all the air bubbles while kneading it...the dough will become its original size...

6. Then using fingers only shape the dough in the form of a loaf... and place it on a well oiled baking tray...(see the picture below for reference)


6. Then again place it in a warm spot the loaf increases in size (the above picture shows the already increased size of the loaf)...

7. Preheat the Oven to 180*C...

8. On the increased loaf, brush the top of the loaf liberally with olive oil...and sprinkle it with more Oregano...you can leave it like that if you donot like any other topping...but as I said earlier I like some stuff so I sprinkle grated cheese, olives and sun-dried tomatoes...(check the picture below for reference)


9. Then bake the loaf for about 15 - 20 minutes...the top of the loaf must be golden and when you lift the loaf and tap it on the bottom side...it should sound hollow...(be very careful when lifting the loaf to check this it will be very hot....use your oven mutt...so that it wont burn you...)

10. The finished product looks as the picture below...and as I already said you can eat as it is...and believe me the aromas are awesome and taste this warm bread on your palate cannot be described...and you will definitely fall in love with the art of Bread Baking...Trust me [:-)]


I will follow up this recipe with a wholesoup soup for which this bread goes as a great accompaniment...

Variation:
If you dont like Oregano...you can use dried Rosemary or Thyme....or any Italian Dried Herbs...

Image Source: My Trusty Phone Camera
Recipe Source: Bread Baking Class (with my own additions and deletions ofcourse..he he...:-D)

Disclaimer: Oven Temperatures Vary...so adjust accordingly...

Try this out and do let me know how it comes out...If you are trying baking bread for the first time...I suggest that you follow the recipe as it is...to avoid disappointment..(because remember baking is a art that you need to master before you can alter it...I have tried this many many times before I have gained the confidence...)

So Happy Cooking....:-)

Friday, March 7, 2008

Savoury Cheese Biscuits...

Recipe Origin and Background:
Baking is one of my passions...it was not from childhood but one that developed when i started experimenting some of the traditional recipes that i learnt mainly from my Mom..This passion almost became an obsession when we moved into our flat after I was married...I just started thinking of options to cook stuff using the oven that are sometimes time-saving but most importantly a very healthy option...

Once I started the patisserie course...I have learnt several tricks of a really good baked product be it general food stuff, snacks or cakes...both of us are not much of sweet persons (one hell of a contradiction to what i do...professionally cook sweet stuff all the time)...most my husbands day offs or free time are normally spent before the computer downloading something from the internet or cleaning up the system with his numerous anti-virus stuff...anyways this is the time he generally likes munching something...like nuts, crackers or jantikalu... one day I was brooding on wat munchable stuff I could make for his upcoming day off...and then I remembered an old time favourite my mom made for us as snacks when we were kids...CHEESE BISCUITS...(or they were called Cheese Bits by us..)...

My mom used to make them using Maida, Amul Cheese and bring it together with melted ghee...and then deep fry the bits in oil..A different version of the same recipe is used at work by adding 2 types of cheese and adding milk to make the dough smoother and easy to roll...so I combined the best of both recipe and came out with my own version of the bixies...and these are baked...my addition to this recipe is some flavourings...so here goes my recipe...

Ingredients:
1 Cup Grated Tasty Cheese (basically hard cheeses like Cheddar, Guyere etc)
1 Cup of Powdered Parmesan Cheese
2.5 Cups of Plain Flour(all purpose flour)
1/2 Cup of Full Cream Milk
240 gms of Unsalted Butter Salt and Pepper
Flavourings:
1/2 Cup of Pitted Kalamata Olives(chopped finely)
1/2 Cup of Sun-dried Tomatoes (chopped finely) Preparation

Process:
1. First add the Butter and the Cheese into a bowl and mix to combine them(if using an electric mixer then whisk on low speed for 1 or 2 mins to combine ingredients) to a creamy texture.

2. Then add the flour and salt&pepper and mix again till roughly combined. Then slowly while mixing add the milk.

3. If dough is sticky just add four to reduce the dampness. This is the basic dough for the cheese biscuits. Divide the mixture int 2 parts. and keep aside.

4. To one half of the mix add the finely chopped olives and mix thru till well combined. Mix thru the finely chopped semi dried tomates as well to the other half of the dough.

5. Then lightly flour the work surface you working on(just like how we do for chapatis before we roll them) and then roll the two kinds of dough into logs about 1cm(abut the size of a 1 Rupee coin) in diameter. The below picture illustrates that.


6. Line all the logs onto a lightly floured tray(to prevent from sticking). Refrigerate them for about 30 minutes to one hour to help firm up the dough.

7. Preheat your oven to 150*C. Line baking tray or cookie tray with baking paper.

8. Then bring out the rolled logs from the fridge and cut them into 1/2cm pieces.


8. Line them on the tray and bake them for 20-25 minutes or until you are able to lift one from tray without it sticky or until light golden brown. (picture above)

9. Allow to cool on a different tray. Once they are cooled store them in airtight containers and these biscuits last for 1 week to 10 days.

10. They are a good accompaniment to tea or coffee or as an indulgent snack.

Variations:If you dont like any of the above mentioned flavours you can use chives or roasted bell peppers or just herbs like rosemary, thyme etc.

Image Source: My Trusty Phone Camera

Recipe Source: My Brain (he he he...:-D)

Hope you like the recipe...do let me know how they work out ( if you try them out)...

Happy Cooking...:-)